How to Read an Ultrasound picture: An ultrasound scan, better known as ultrasonography is a medical test that uses high-frequency sound waves to penetrate your skin and capture an image of the internal organs of your body. This is a very popular test performed by doctors all over the world to check on the problems with organs, blood vessels or tissues in your body without having to make any kind of incisions.
If you have had an ultrasound imaging done on your or any of your close ones recently and want to know how to interpret the images yourself without taking the help of a doctor, you first need to know the basics of ultrasound imaging and the different aspects related to it. This will help you immensely to interpret an ultrasound picture correctly. To help you out in your endeavor, we have presented this complete guide on how to read an ultrasound picture. In this article, we are going to share the two best methods to read an ultrasound image correctly without having worry a great deal about the technical aspects.
How to Read an Ultrasound Picture: 2 Best Methods
Before we start discussing the two methods to read an ultrasound image depending on its type, it would be worthwhile to know the basics of ultrasonography. In case you don’t already know, various body tissues of our body conduct sound different through them. While some absorb most of it, some reflect it back completely. The speeds at which the sound signals are reflected back depend on the density of the tissue in question. If you can remember that fluid always appears black on an ultrasound slide, while tissues are gray, it will make your job a lot easier.
Method 1: Reading a General Ultrasound Slide
If you have an ultrasound picture slide depicting a part of an internal organ or the whole internal section of a human body, you can use this method to decipher the image. Just follow the steps below.
- STEP 1: Hold the plate against a bright source of light in the correct orientation. To ensure that you are holding it in the correct orientation, follow the text and numbers found on the top of the slide. If they are displayed correctly, then you are holding it all right.
- STEP 2: Disregard the text and numbers found on the top of the ultrasound slide. These texts and numbers usually depict the name of the patient, the name of the hospital, ultrasound machine settings, etc. Since these do not play any role in the actual image, you can safely ignore them.

- STEP 3: Start viewing the slide from the very top and slowly move down. The top part of the image usually depicts the part of the body where the ultrasound probe was placed. As you start to go further down, you will see deeper tissues of the body that will appear in gray with the fluid (blood) in the background in black.
- STEP 4: As you move down, start noticing the color differences in the slide. While all ultrasound slides come in black and white shades, there are major differences in the shades depending on the density of the tissues in question. Use the following guide below to determine the tissue you are viewing
- Solid tissues like bone will appear white as it reflects more sound than others
2. Fluids like blood or amniotic fluid in the uterus will appear black as most of the sound gets absorbed by them
3. Any other type of tissues like uterine tissue, liver tissue, etc will appear in gray as the sound is only partially absorbed
- STEP 5: Using the guide posted above, try to determine the section of the body depicted in the slide. Most ultrasound pictures are mirrored which means the left side of the body is depicted on the left side of the slide and vice versa. This will help you ascertain the side of the body or the organ you are currently viewing.
- STEP 6: Pay attention to the visual signs and spot any anomalies if you can. Since ultrasound images are based on sound, they are not extremely clear so you should take notice of any anomalies you can find in the slide, like an area of extra brightness or a dark patch in the middle of a bright area.
You may like: How to Quote on Reddit: Your One Stop Guide
Method 2: Reading a Pregnancy Ultrasound Slide
Ultrasound imaging provides a great way to determine the sex of an unborn child, while it is still in the mother’s womb. Apart from that, ultrasonography is also performed in different stages of pregnancy to determine the growth of the child. If you want to read an ultrasound picture of a pregnant woman, follow the steps below.
- STEP 1: Hold the plate against a bright source of light like before and follow the instructions posted under step 1 above.
- STEP 2: Try to identify the womb first. You can identify the uterus in the image by following the white or gray line around the edges of the slide. Inside this boundary line, there should be a dark patch which is the amniotic fluid.
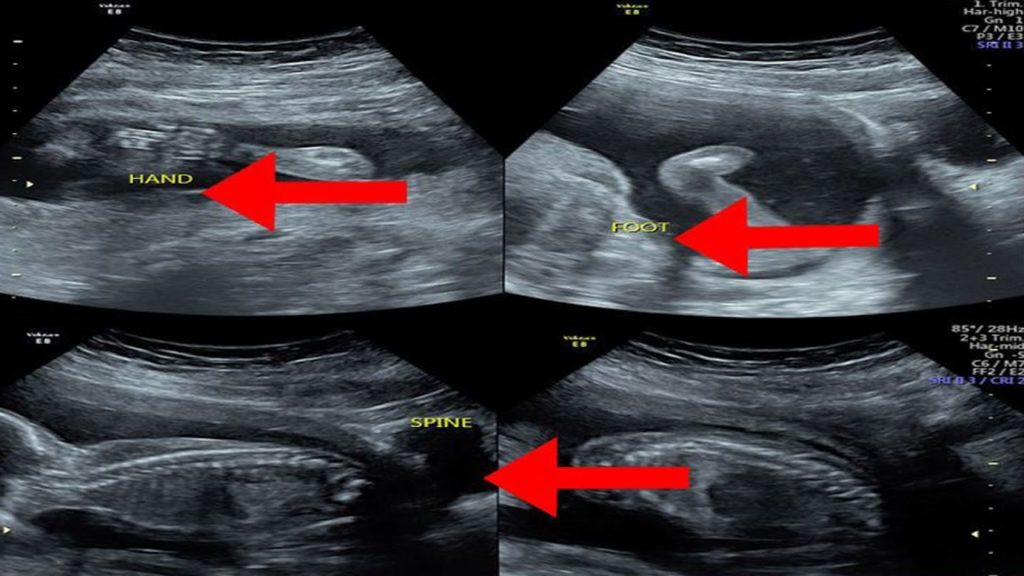
- STEP 3: Now try to spot the baby. It will also look whitish or dark gray and should be located inside the amniotic fluid (the dark patch ). Look at the area surrounding the amniotic fluid to carefully make out the baby.
- STEP 4: You can determine the sex of the baby once you have found the outline in the previous step. It is important to remember that it may not always be possible to determine the sex by this method and you may need to perform a 3D or 4D ultrasound. To determine the sex, doctors usually look for a penis or three lines that represent the labia.
Wrap Up
By now, you should have got a fair idea about ultrasound imaging and how to read an ultrasound picture correctly. While you can use any of these methods to decipher an ultrasound image depending on the type of slide you are viewing, it is recommended to get the slide checked by a qualified doctor or obstetrician to avoid any gross errors.